You know what, there are no really good sugar free alternatives for jam out on the market. If you go to the grocery store they have a sugar-free jam made with artificial sweeteners. But the research has shown that the artificial sweeteners are as damaging or more damaging to your health than sugar.
There are a couple brands that try to pretend they are good for you by using honey as their source of sweetness. But unfortunately commercial honey these days is really just sugar water. Literally, they put drip jars of sugar water on the beehives for the bees to eat and make into honey. That is assuming you aren’t using the cheap honeys that are really
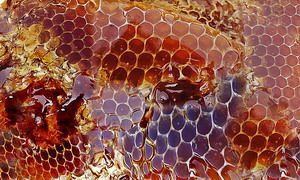
honey-flavored corn syrup and about 10% added honey. Real ‘made from flower nectar’ honey is scarce and expensive – not what you would make commercial jam with.
The other health alternative I have found in a couple places is jam made with xylitol as the sweetener. This is a good choice, but only eat a little as xylitol has that famous laxative effect if you eat too much. How come nobody makes jam sweetened with simple stevia? That kind of thinking is usually dangerous for me because that means I am going to try to make it myself.
Well in this case it was a good thing. I had always thought making jam was a difficult and laborious process. It’s not! It is super simple – follow along and see just how easy it is to make sugar free stevia sweetened jam.
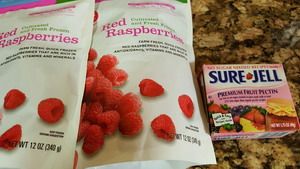
The first step is to gather your ingredients, which in this case is rather simple. Choose your fruit – which today is raspberries. I happened to have a couple bags of frozen ones at home, otherwise I would have used fresh raspberries. I like raspberries not only for their tangy deliciousness, but also for the fact that they are the lowest carb fruit after lemons and limes.
The other two ingredients needed are your sweetener and pectin. Instead of sugar I used my stevia drops. For pectin I used Sure-well powdered pectin. There are many brands such as Ball, Dutch, Mrs, Wages, and Pomona’s. There are usually two types of this pectin – regular and low sugar recipe types. Obviously for my purposes I chose the low sugar variety. Regular pectin binds to the sugar to produce the gel in the jam, while the low sugar type binds to calcium to form the gel. So if you have low calcium levels in your water supply – like if you have a water softener system – your jam may not gel well.
Also have ready your canning jars for putting the hot jam into. They should be clean/sterile.
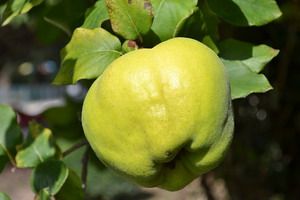
If you are a truly back to basics person you can actually make your own pectin from young unripe apples or quinces by boiling them and then letting them drain through cheesecloth overnight. The liquid drained off contains the pectin. If you are interested in really getting old school with your jam, do a web search on how to make pectin. But for my purposes I was looking for a quick and easy jam recipe for my first attempt.
The whole process is really simple, especially for jam you intend to eat right away.
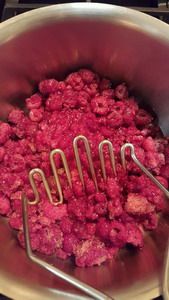
Smash the fruit up in a saucepan and add about ¾ cup of water. You will need about 4 to 6 cups of fruit. Any kind of berries works well, as well as apricots, grapes, peaches, plumbs, cherries, and even oranges and hot peppers. The instructions in the box of pectin give pretty explicit instructions for making jam with sugar and simpler instructions for making jam with non-caloric artificial sweetener. I followed the artificial sweetener instructions but substituted my stevia instead.
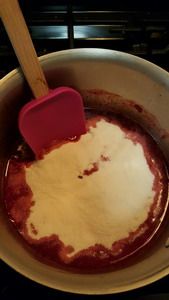
Add the package of pectin to your fruit and mix it in well. Since stevia does not lose flavor when heated, I used this step to also add the stevia. I only needed a few drops to bring the sweetness up to the level I like. Just a a few drops at a time and taste the result. When it is as sweet as you want then it is time to turn on the heat.
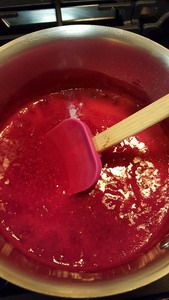
You want to bring the fruit, water, pectin, and stevia mixture to a rolling boil for 1 minute. As you bring the mixture to a boil, there will be a point where the bubbles will stop because of the stirring. When it gets to a full rolling boil it will keep bubbling even while you stir it. When it gets hot enough that stirring does not stop the bubbling, then you are officially at a full rolling boil. Turn off the heat after one minute.
Immediately pour the hot jam mixture into the canning jars. Fill the jars up to within ¼ inch of the top if you are planning to make a jam that will store on the shelf. If it will just be used right away then this is not important. Put your lid on and seal it up tight.
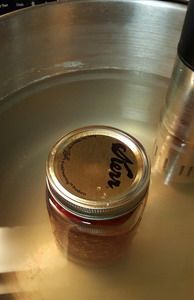
For long-term storage you need to sterilize the jars with the fruit in them by putting the jars in a hot water bath for 10 minutes. The water needs to be brought to boiling for 10 minutes and it needs to cover the top of the jar with at least one-inch of water. As I said, if you are going to use the jam right away then this step is not necessary. This is the step that I always thought was too much work in the canning process because of the boiling water and having to fetch the jars out of the water with special tongs so as to not get burned.
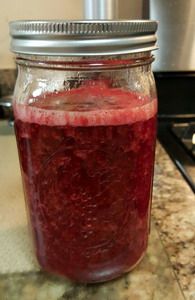
Either way you process your jam, after the jam is put into the jars let it sit out on the counter undisturbed for 24 hours while it sets up. The jar that was boiled in the water bath should have the lid vacuum seal itself. It should be solid. It is now ready to store on the shelf for up to 6 months. For the jam that was simply hot poured into the jars, put it into your fridge and enjoy it from there. Because it has no added sugar it will have to be kept in the fridge. Sugar is toxic to most life forms (including us) which is why it works as a food preservative. High sugar jams can stay in your cupboard without much worry. Certain molds can survive the high sugar environment, but not much else. We have just made a no sugar jam, so keep it refrigerated! Here is some
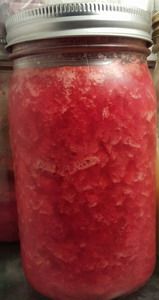
strawberry jam I made last week.
So there you have it – no sugar jam! How fabulous is that. Ellen loves it on her gluten free toast in the morning, and it is low enough carb that I can use it on toasted Dr. Dave Miracle Bread. We also love it on our usual dinner – homemade coconut-almond milk yogurt. I like to load my system with all those good probiotics at the end of the day and although it tastes delicious just as it is, some raspberry jam mixed in really makes it a taste treat.
Big picture message – healthy living can be delicious.